DIY Dead Sea Salt Soap Recipes

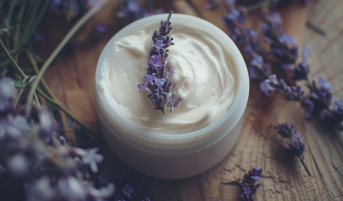
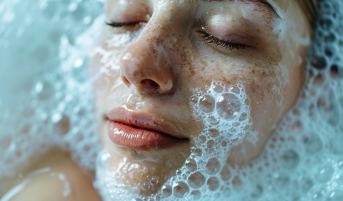
Ever tried a soap that feels like it’s straight from a spa? That’s what Dead Sea salt soap reminds me of—a mini escape in the shower, every single day. I came across it while looking for something that might actually help with some of the common skin challenges we all face, from dryness to irritation. Dead Sea salt caught my eye because it’s loaded with minerals like magnesium, calcium, and potassium, which have long been appreciated for their potential skin benefits. Many people swear by it for soothing everything from eczema to occasional dry patches, giving skin that refreshed, nourished feeling.
If you’re curious about making your own Dead Sea salt soap, it’s surprisingly simple, and you have two main ways to go about it: melt and pour, or the cold process method. Melt and pour is like the soap-making version of "just add water"—you melt a pre-made soap base, mix in the Dead Sea salt and whatever extras you want (think essential oils or colors), and boom, you're done. It's quick and great for beginners.
But if you’re up for a bit more of a challenge, the cold process method lets you customize every part of the soap. You mix up your oils, lye (yes, lye!), and Dead Sea salt from scratch, so it’s a bit of a chemistry project—but totally doable with a little patience. The best part? You end up with a soap that’s exactly what you want and might even impress a few friends if you share your creations.
Melt and Pour Dead Sea Salt Soap Recipe
Ingredients Breakdown
Soap Base (1 lb): A “soap base” is a ready-made mixture of soap ingredients that have already gone through saponification (the process that turns fats and oils into soap). This means you don’t have to handle lye, making it super beginner-friendly! Popular bases include:
- Shea Butter Base: Rich and moisturizing, ideal for dry or sensitive skin.
- Glycerin Base: Known for its clear appearance, it’s also great for keeping skin soft and hydrated. Perfect if you want to add colors for a vibrant look.
- Goat Milk Base: Creamy and gentle, this base works well for people with sensitive skin or conditions like eczema.
You can find these soap bases online, at craft stores, or specialty skincare shops.
Dead Sea Salt (2-3 tablespoons): The star ingredient! Dead Sea salt is unique because it contains a higher concentration of minerals (like magnesium, calcium, and potassium) compared to regular sea salt. These minerals are thought to improve skin hydration, exfoliate dead skin cells, and calm irritated areas. Use fine or extra-fine grain Dead Sea salt for a smoother lather and easier mixing.
Essential Oils (3-5 drops): Essential oils are optional but add a lovely scent and can provide additional skin benefits. Here are a few popular choices:
- Lavender Oil: Soothing and calming for both skin and senses.
- Tea Tree Oil: Known for its antibacterial and anti-inflammatory properties, great for acne-prone skin.
- Peppermint Oil: Refreshing and invigorating, perfect for a morning wake-up!
Colorants (optional): If you want to add a pop of color, you can use natural colorants like mica powders. These add a gentle shimmer or hue without irritating the skin. Start with a pinch and add more if you want a bolder color.
Dried Botanicals (optional): For a spa-like look, you can sprinkle in dried herbs or flowers like chamomile, calendula, or lavender buds. They add a natural aesthetic, but keep in mind that some botanicals can darken over time in the soap.
Step-by-Step Instructions
- Prepare the Soap Base: Start by cutting your soap base into smaller chunks; this helps it melt more evenly. Place the chunks in a heat-safe bowl. You can melt the soap base in the microwave (heat in 20-30 second intervals, stirring each time) or use a double boiler on the stovetop. The goal is to reach a smooth, fully melted liquid without letting it overheat.
- Add Dead Sea Salt and Essential Oils: Once the base is melted, carefully add 2-3 tablespoons of Dead Sea salt. Stir well to ensure the salt is evenly distributed. Then, add 3-5 drops of your chosen essential oil and mix. If you’re adding colorants, now’s the time to stir those in as well—start with a small amount and adjust as needed.
- Pour the Mixture into Molds: Place your soap molds on a flat, heat-safe surface. Slowly pour the soap mixture into each mold cavity, filling them as evenly as possible. Pouring slowly helps prevent bubbles and ensures even salt distribution.
- Let the Soap Set: Allow the soap to cool and harden. This typically takes about 1-2 hours, but you can speed up the process by placing the molds in the fridge for a bit. Once fully set, gently pop the soaps out of the molds.
- Wrap or Store: If you’re not using the soap right away, wrap each bar in plastic wrap or store them in an airtight container. This keeps them fresh and prevents glycerin-based soaps from attracting moisture.
Cold Process Dead Sea Salt Soap Recipe
The cold process method is where you get to feel like a real soap artisan. While it involves working with lye, which requires a few safety precautions, it also allows for endless customization. Plus, you get the satisfaction of creating your soap entirely from scratch!
What You’ll Need
Oils: High in coconut oil for lather and cleansing (e.g., 40-50% of total oils), combined with olive oil, shea butter, or other nourishing oils to balance moisture.
Lye (Sodium Hydroxide): This is the ingredient that, when mixed with oils, actually turns your mixture into soap. It’s essential to handle lye safely (see below for tips).
Water or Alternative Liquids (Aloe Vera Juice, Coconut Milk, or Goat Milk): You’ll mix this with lye to create the “lye solution.” Using alternatives like coconut milk or aloe vera juice adds extra hydration.
Dead Sea Salt: Use 50-100% Dead Sea salt relative to the oil weight. Fine or extra-fine grain works best for a smoother texture.
Essential Oils and Colorants: Optional, but a nice way to personalize your soap.
Safety Gear
- Gloves and Eye Protection: Essential for working with lye to avoid any contact with skin or eyes.
- Well-Ventilated Area: Mixing lye can release fumes, so make sure you’re in a well-ventilated space or near an open window.
Step-by-Step Instructions
- Prepare Your Ingredients and Workspace: Set up all ingredients and safety gear. Have your oils measured and your molds ready, as the process can move quickly.
- Create the Lye Solution: Slowly add the lye to your water or chosen liquid (never the other way around!) in a heat-resistant container. Stir gently until the lye dissolves completely. Be cautious here—lye heats up quickly and can release fumes, so keep your face away and stir slowly. Let this solution cool to around 100-110°F.
- Heat the Oils: While your lye solution is cooling, melt any solid oils (like coconut oil) and combine them with the liquid oils in a separate bowl. Allow the oils to cool to around 100-110°F, matching the temperature of your lye solution.
- Mix Lye Solution with Oils: Once both mixtures reach the target temperature, slowly pour the lye solution into the oils. Use an immersion blender to blend the mixture until it reaches “trace”—a pudding-like thickness where you can see faint trails on the surface. This is where the magic of soapmaking begins!
- Add Dead Sea Salt and Custom Ingredients: Quickly mix in your Dead Sea salt, essential oils, and any colorants. Salt accelerates trace (it makes the mixture thicken fast), so you’ll need to work quickly from here.
- Pour into Molds: Pour the soap batter into your molds. Use a spatula to smooth the tops, as the salt can give it a textured finish.
- Curing and Unmolding: Let the soap sit in the molds for 24 hours, then gently unmold. Cold process soap requires a curing period to harden, so place the bars in a cool, dry place to cure for 4-6 weeks. This curing time helps the soap firm up and ensures a long-lasting bar.
Additional Tips
- Superfatting: Cold process soap can be drying, especially with a high percentage of coconut oil. Adding a bit of extra oil (known as “superfatting”) helps keep the soap moisturizing. Aim for a 5-8% superfat for balance.
- Fine-Grain Salt: Stick with fine-grain Dead Sea salt for a smoother lather, as larger grains can be abrasive.
Tips and Tricks for Making Dead Sea Salt Soap
- Use Fine or Extra-Fine Dead Sea Salt: For both melt-and-pour and cold process methods, fine-grain salt gives the best results. It dissolves more evenly in the soap mixture and creates a smoother lather. Larger salt grains can be rough on the skin and don’t blend as easily, which can lead to a grainy or abrasive texture.
- Work Quickly with Salt in Cold Process Soap: Dead Sea salt can accelerate trace (thickening) in cold process soap, especially if you’re using a high percentage. Once you add the salt, be prepared to pour into the molds fairly quickly to avoid the mixture hardening too soon.
- Individual Cavity Molds for Easier Unmolding: If you’re new to soapmaking, using individual molds (like silicone muffin molds or cavity soap molds) can make the process easier. Salt soaps tend to harden quickly, so individual molds are more beginner-friendly and prevent the hassle of trying to cut a solid block.
- Consider Oven Processing (Optional for Cold Process): To force the soap to “gel,” you can try oven processing. Preheat your oven to around 170°F, place the molds on a baking sheet, and turn the oven off. Let the soap sit in the residual heat for an hour. This can help the soap fully gel, giving it a smoother, more polished look.
- Store in a Cool, Dry Place During Curing: For cold process soap, curing is essential. Store your bars in a well-ventilated area on a drying rack. Make sure they’re not touching each other to ensure even airflow, which helps the soap dry and harden over the curing weeks.
- Experiment with Add-Ins: Don’t be afraid to get creative! You can add dried herbs like chamomile or calendula, or even a hint of mica powder for color. Just keep in mind that some additives can affect the texture and shelf life, so start small and see what works best for you.
To Sum Up
Making your own Dead Sea salt soap is a rewarding way to bring a bit of luxury and skin-loving minerals into your daily routine. With its unique mix of moisturizing, exfoliating, and soothing properties, Dead Sea salt soap can be a great addition to any skincare routine, especially if you deal with dryness or sensitive skin.
Whether you choose the quick and simple melt-and-pour method or dive into the customizable world of cold process soap, the results are worth it. Plus, you get to enjoy the satisfaction of crafting something truly your own—and maybe even sharing a few bars with friends!
If you’re intrigued by the soap-making journey, don’t stop here! There are plenty of online resources, communities, and blogs dedicated to soap-making tips, troubleshooting, and inspiration. Give these recipes a go, experiment with your own add-ins, and enjoy the process. Here’s to many spa-like showers ahead!